Top Tips On How to Take School Photos
Top Tips On How to Take School Photos

This is a great blog for teachers who are in charge of their social media accounts or updating their school website as I will be giving you some top tips on how to take school photos. Remember that photos, used smartly, are a fantastically powerful part of your wider parental engagement strategy.
Hopefully these tips I’m going to share will help with taking photos in school and will take your photos to the next level. Some of these tips and techniques are what I use myself when I go into schools taking photos professionally.
The Legal Bit
Let’s get the boring bit out of the way! I feel I do have to mention it, as it’s important and can cause major issues if not addressed properly. Most of you will be aware by now that you have to get consent from the child’s legal guardian. You need to have a process in place with consent forms and make all full-time and part-time staff aware so it covers you and the school.
As you go around the school you’ll start to know which kids can and can’t have their photo taken. If you’re not sure then it is best not to use the photo.
The General rule of thumb; don’t identify the child with personal details in the description, such as their name and age etc. This will save you breaking the Data Protection Act 2018. If you want more information about Data protection click here.
We need to keep the children safe. This must be a priority and something too not to be ignored or taken lightly.

What & Where?
The next thing you need to do is to think about what you are going to photograph and where you are going to use it!
This is more of the planning stage and this helps in the later stages of where you want to use the photo. In school you will either use mobile or iPad, both are great and there’s no discrimination if you use android as I am an android user myself. I always get heckled in the office for it.
Have a think; what you are you taking photos for and where are they going? Are they going on your social page? Therefore you can take more candid shots. Are the photos going on your website? If so and you have image banners on your homepage, think what will work well and what will showcase your school best. Are the photos for your school blog? If so, try and have consistency by taking the photo the same way either portrait or landscape to make it look neater and would work better for your site.
Think, what you are taking photos of? Are there upcoming events like sports day or you having a charity bake sale. Thinking ahead help you to be ready to take the photo and so you don’t miss it.

Lighting
This is an important tip, as light is key to a great photo! Outdoor natural light is the best because school lights if you notice, can cast different colours on your subject making them look yellowy or green. You can alter this in the editing stage but it’s best to have all your blinds open in your classroom to let in as must light as possible.
Also, try to avoid using the flash if you don’t know how to use it. As most phones flash directly at the subject, it washes them out and it’s too harsh for the photo. Of course, if the room is too dark then it can’t be avoided but try not to use it.
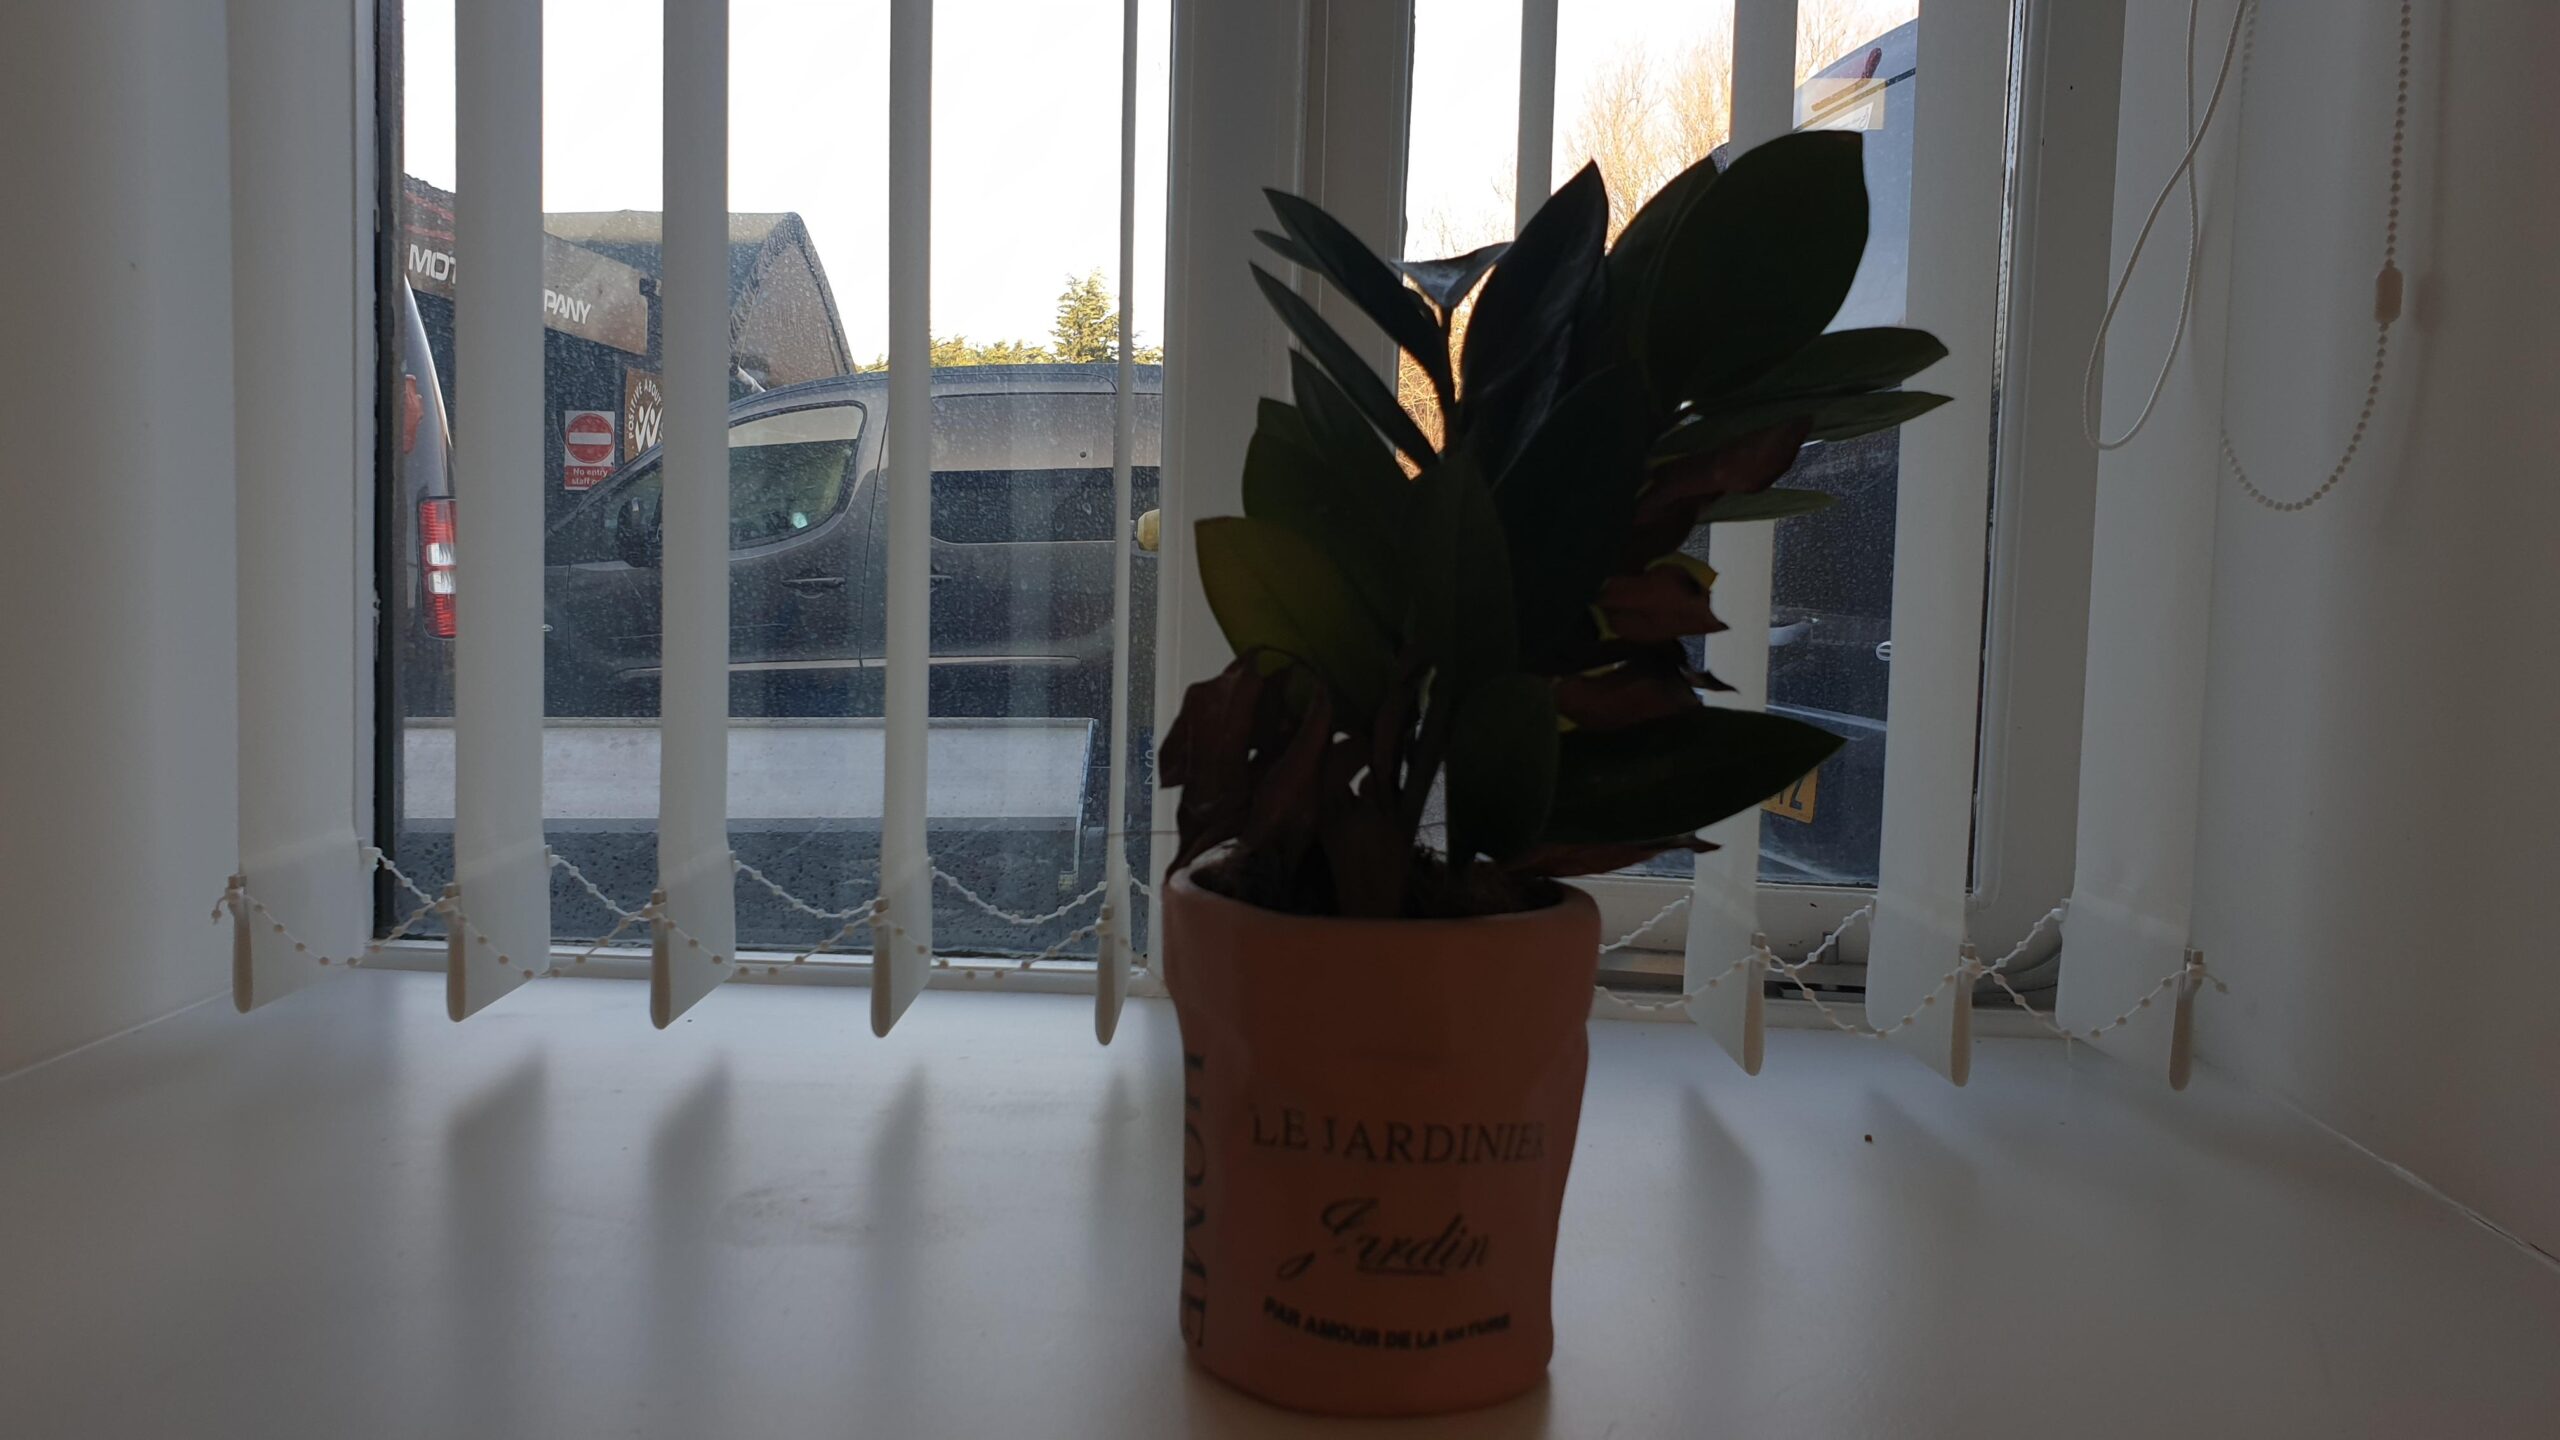
Think where your light source is coming from! If your light source is coming from a window or you’re outside in the sunshine, don’t have your subject in front of the light source, for example standing in front of the window. This is because this will cast a shadow on the subject and the photo will be backlit and you won’t be able to see the subject.
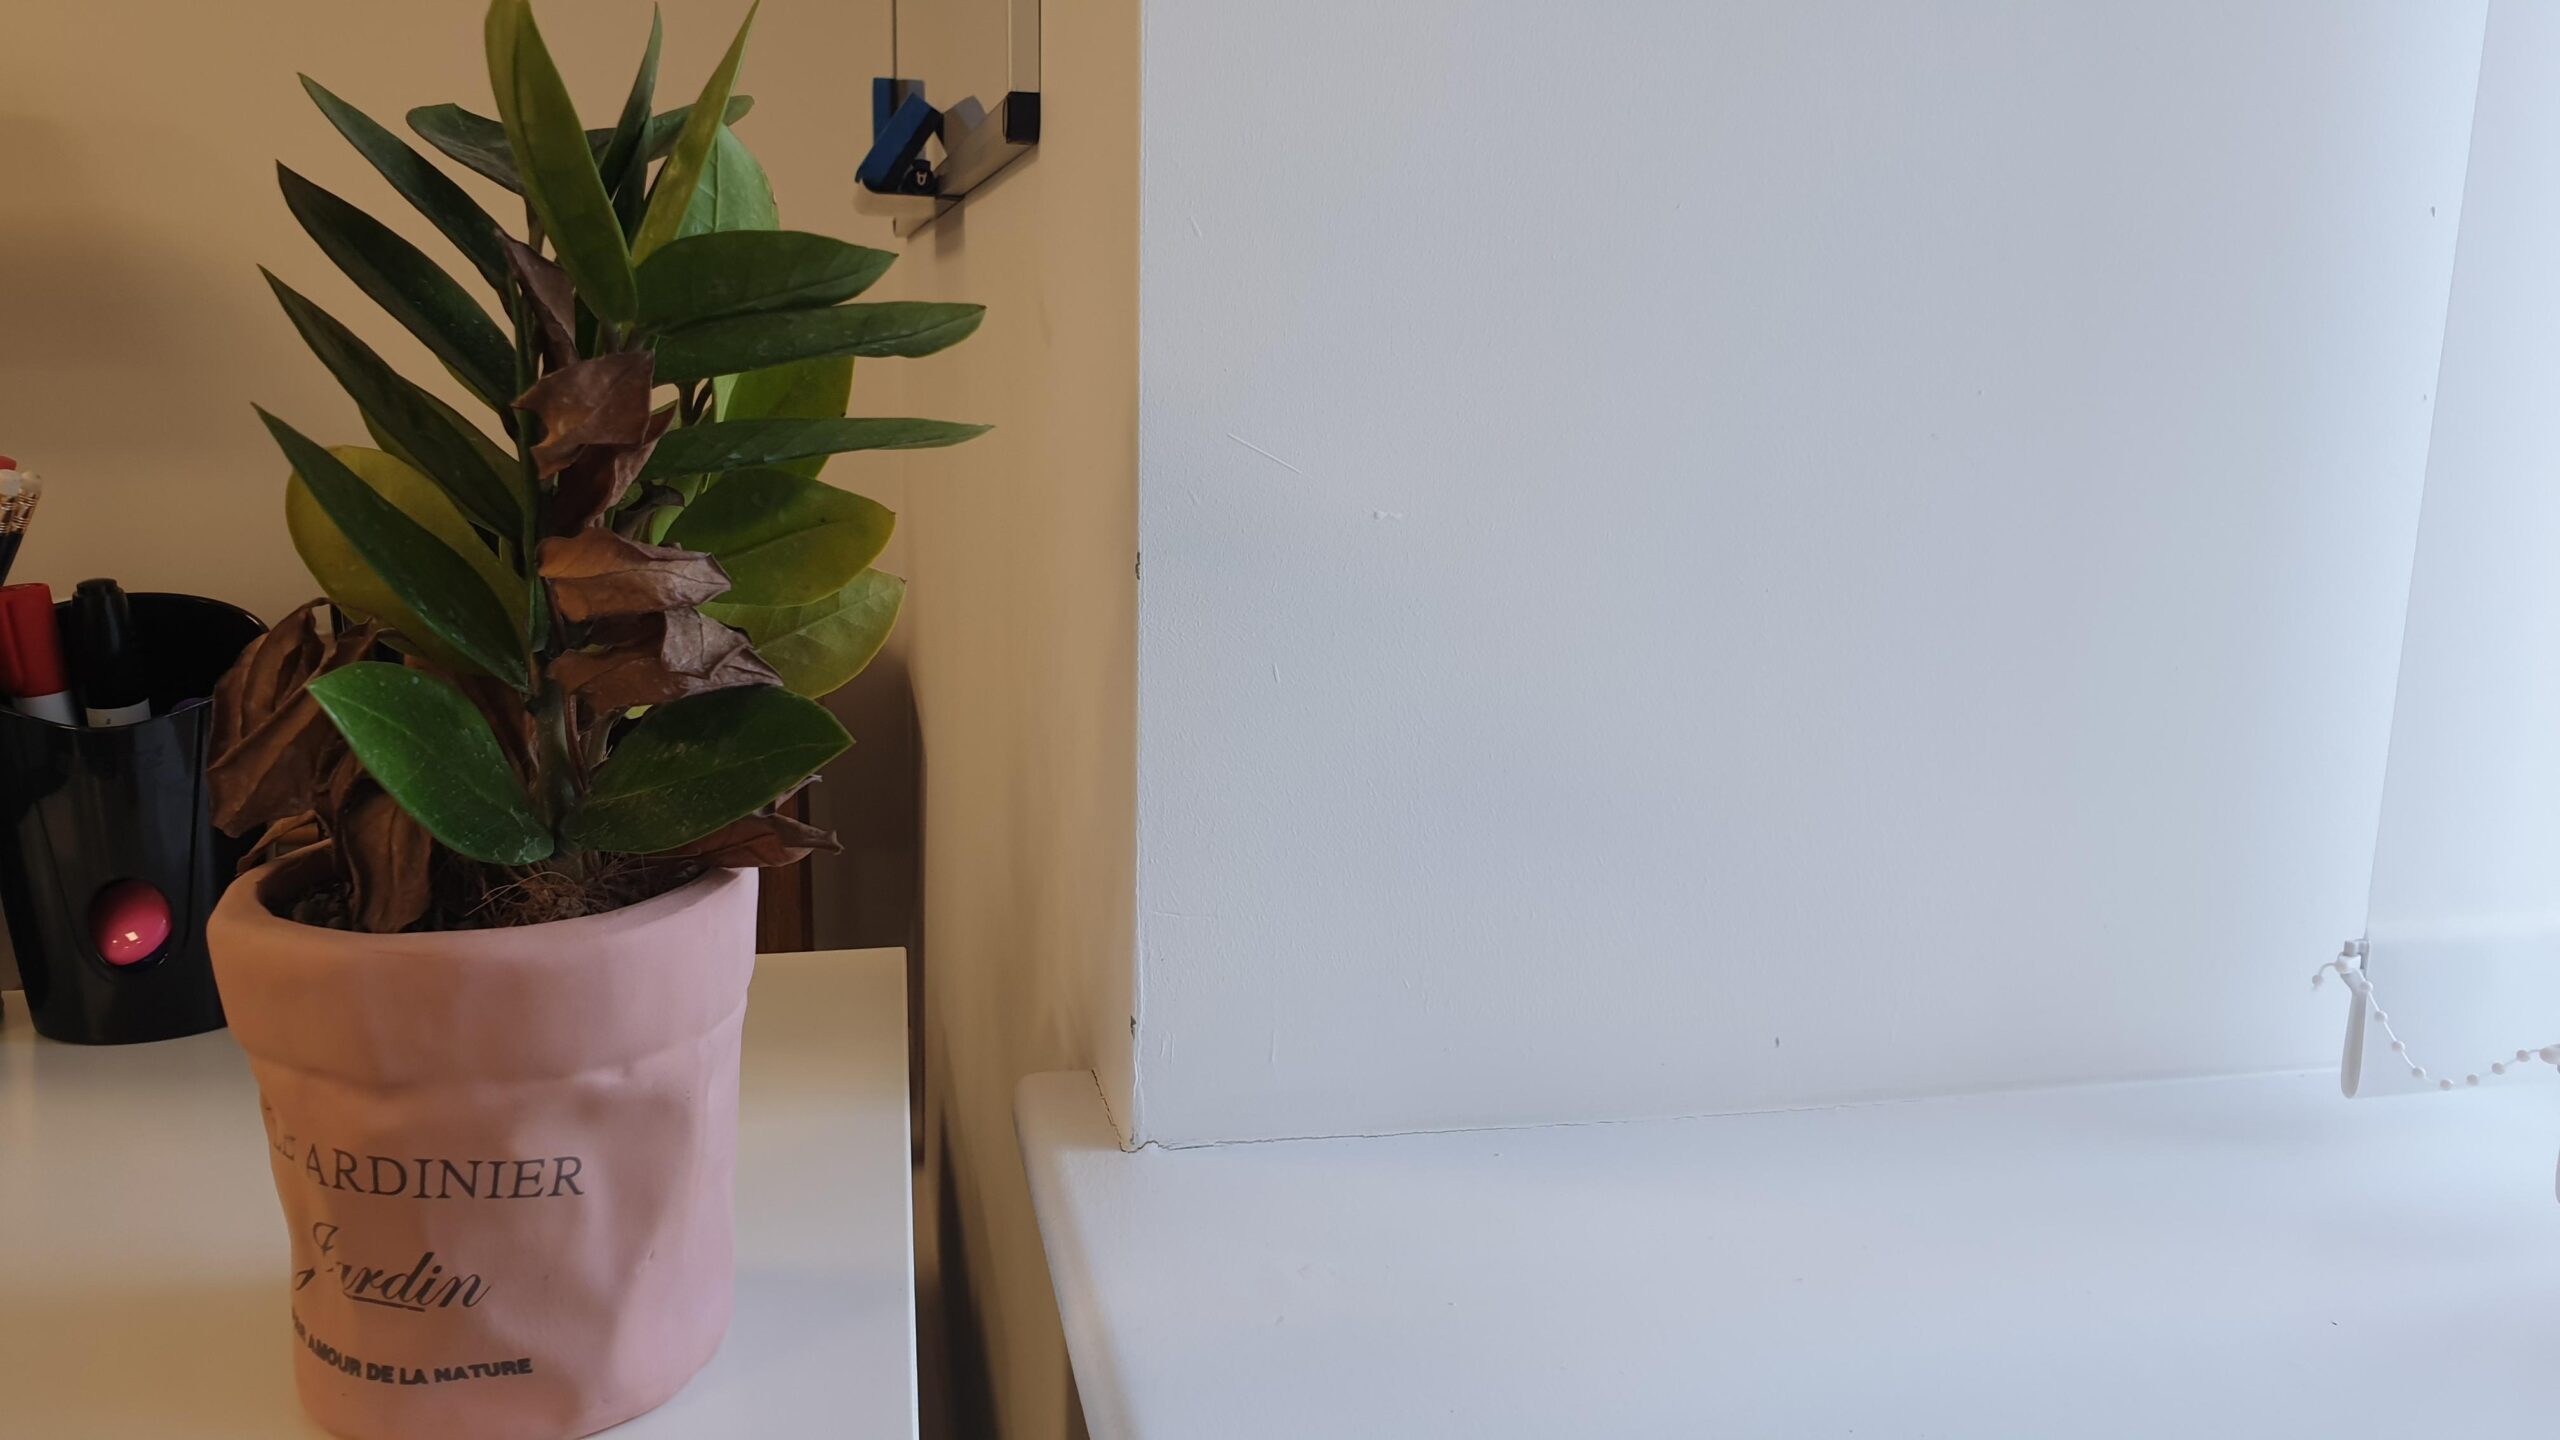
Try having the light source behind you ‘the photographer’ so the subject is facing the light. This way they will be well lit. You can try from the side which can create some nice contrast. See examples below.
The light source from the window, with the object in front. You can see below that the object (plant) is very dark and not well lit.
This image has the same light source from the window. But by repositioning the object and myself the photographer you can see the difference. The subject is better lit and makes a much better photo.
This is another example of a different photo angle. The light source is behind the photographer and the object is in full light.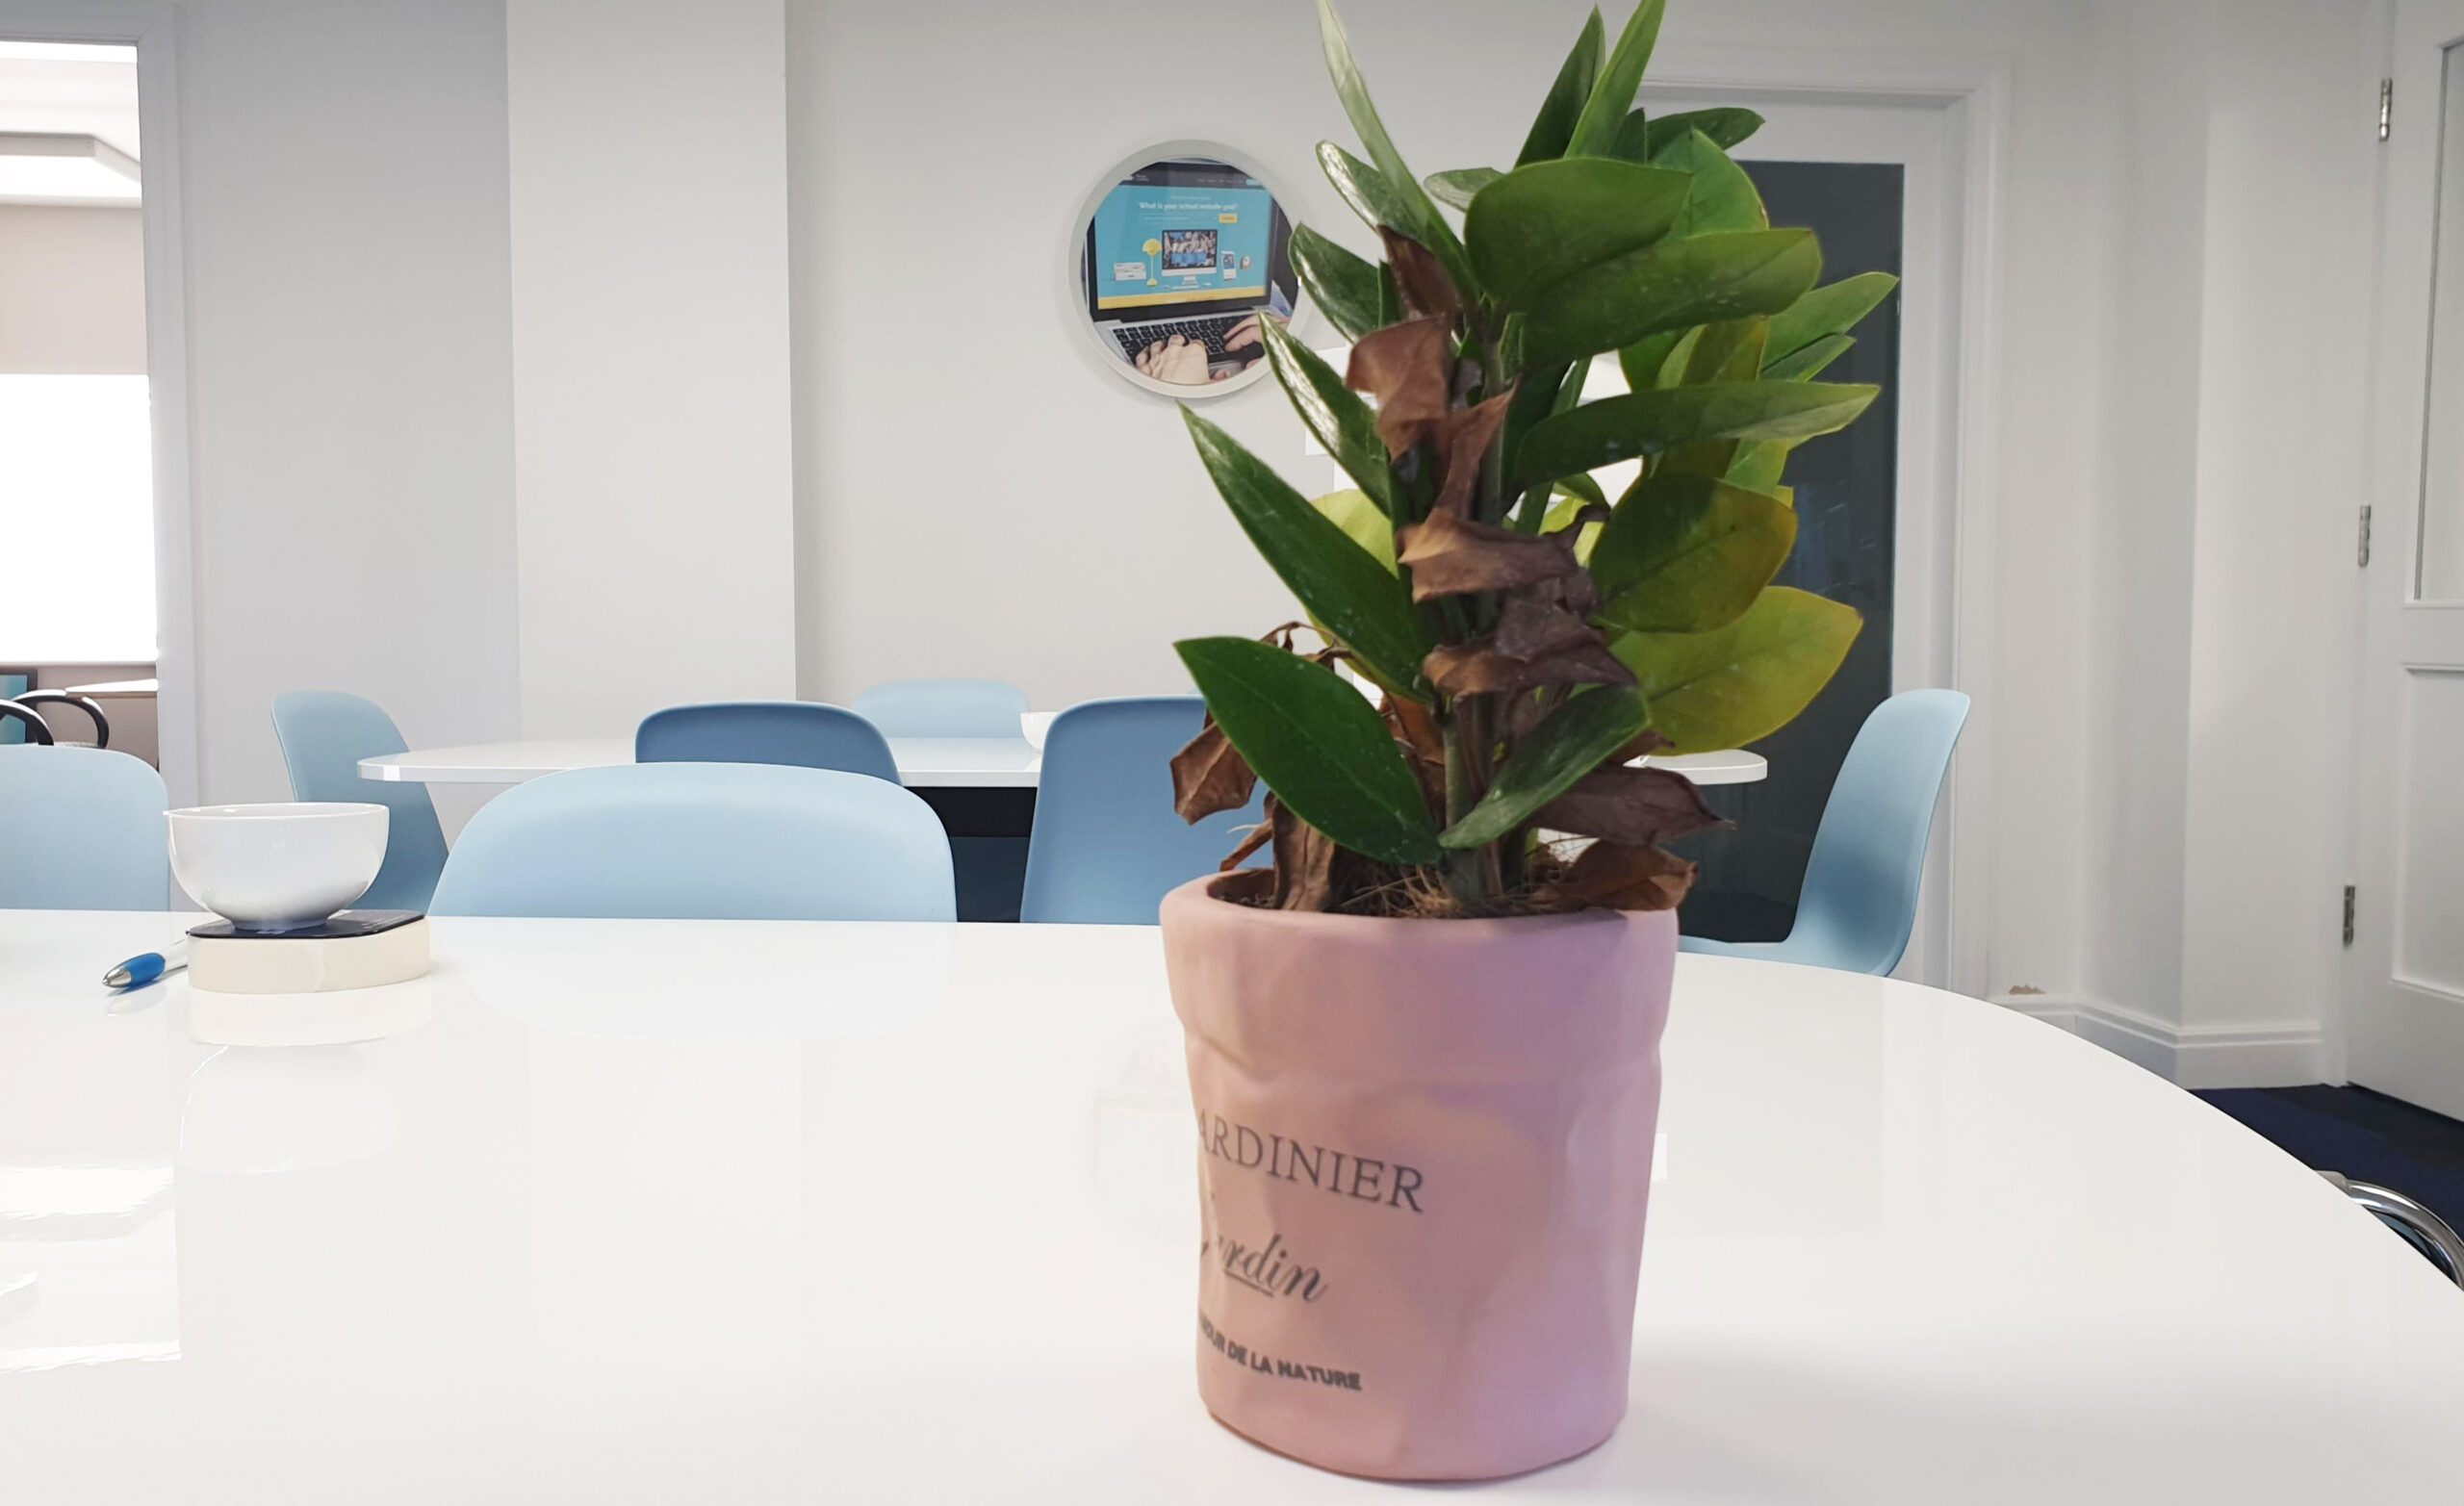
Angles & Orientation
Try different angles!
This is because we see everything from our eye level and that’s how most of us take the photo. To make the photo interesting try different angles. Stand on a chair or get low down.
Rule of thirds
What is the rule of thirds?
“The rule of thirds involves mentally dividing up your image using 2 horizontal lines and 2 vertical lines, as shown below. You then position the important elements in your scene along those lines, or at the points where they meet. A rule of thirds grid.”
You can set up the grid on any devices by going to your camera settings and looking for the grid option.
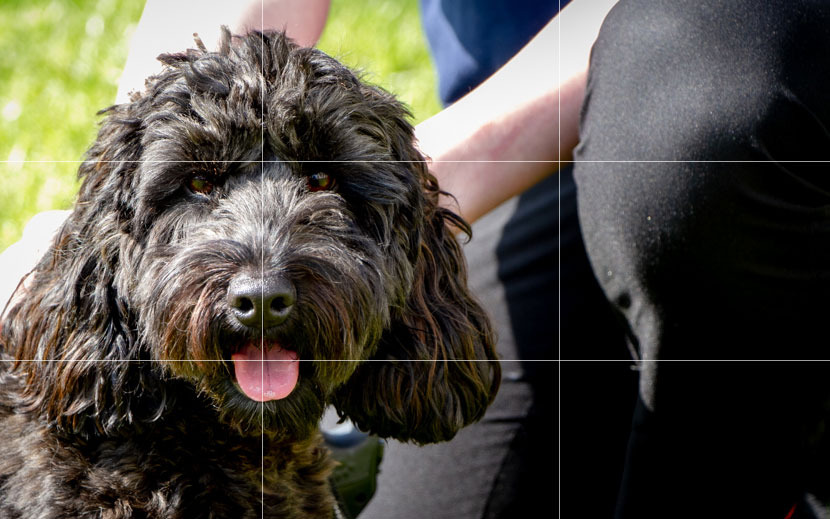
Rule of thirds helps to make the photo more interesting but also to help with spacing especially if you want to add text to the image. For example below, because the dog is at the side you can add the text next to it. Or if you want to update your website banner images, keep the focus in the middle of the photo in the centre of the section to avoid any important bits being cut off the photo.
From the example below, keeping the subject in the centre is the easiest way to use the rule of thirds.
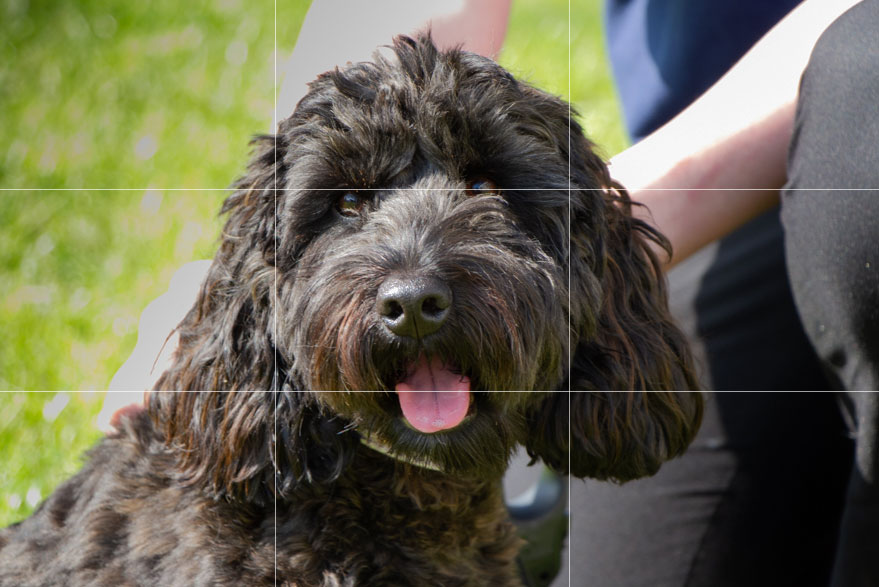
Simply by using the rule of thirds this has given the photo more interest and given some extra space if you wanted to add some text.
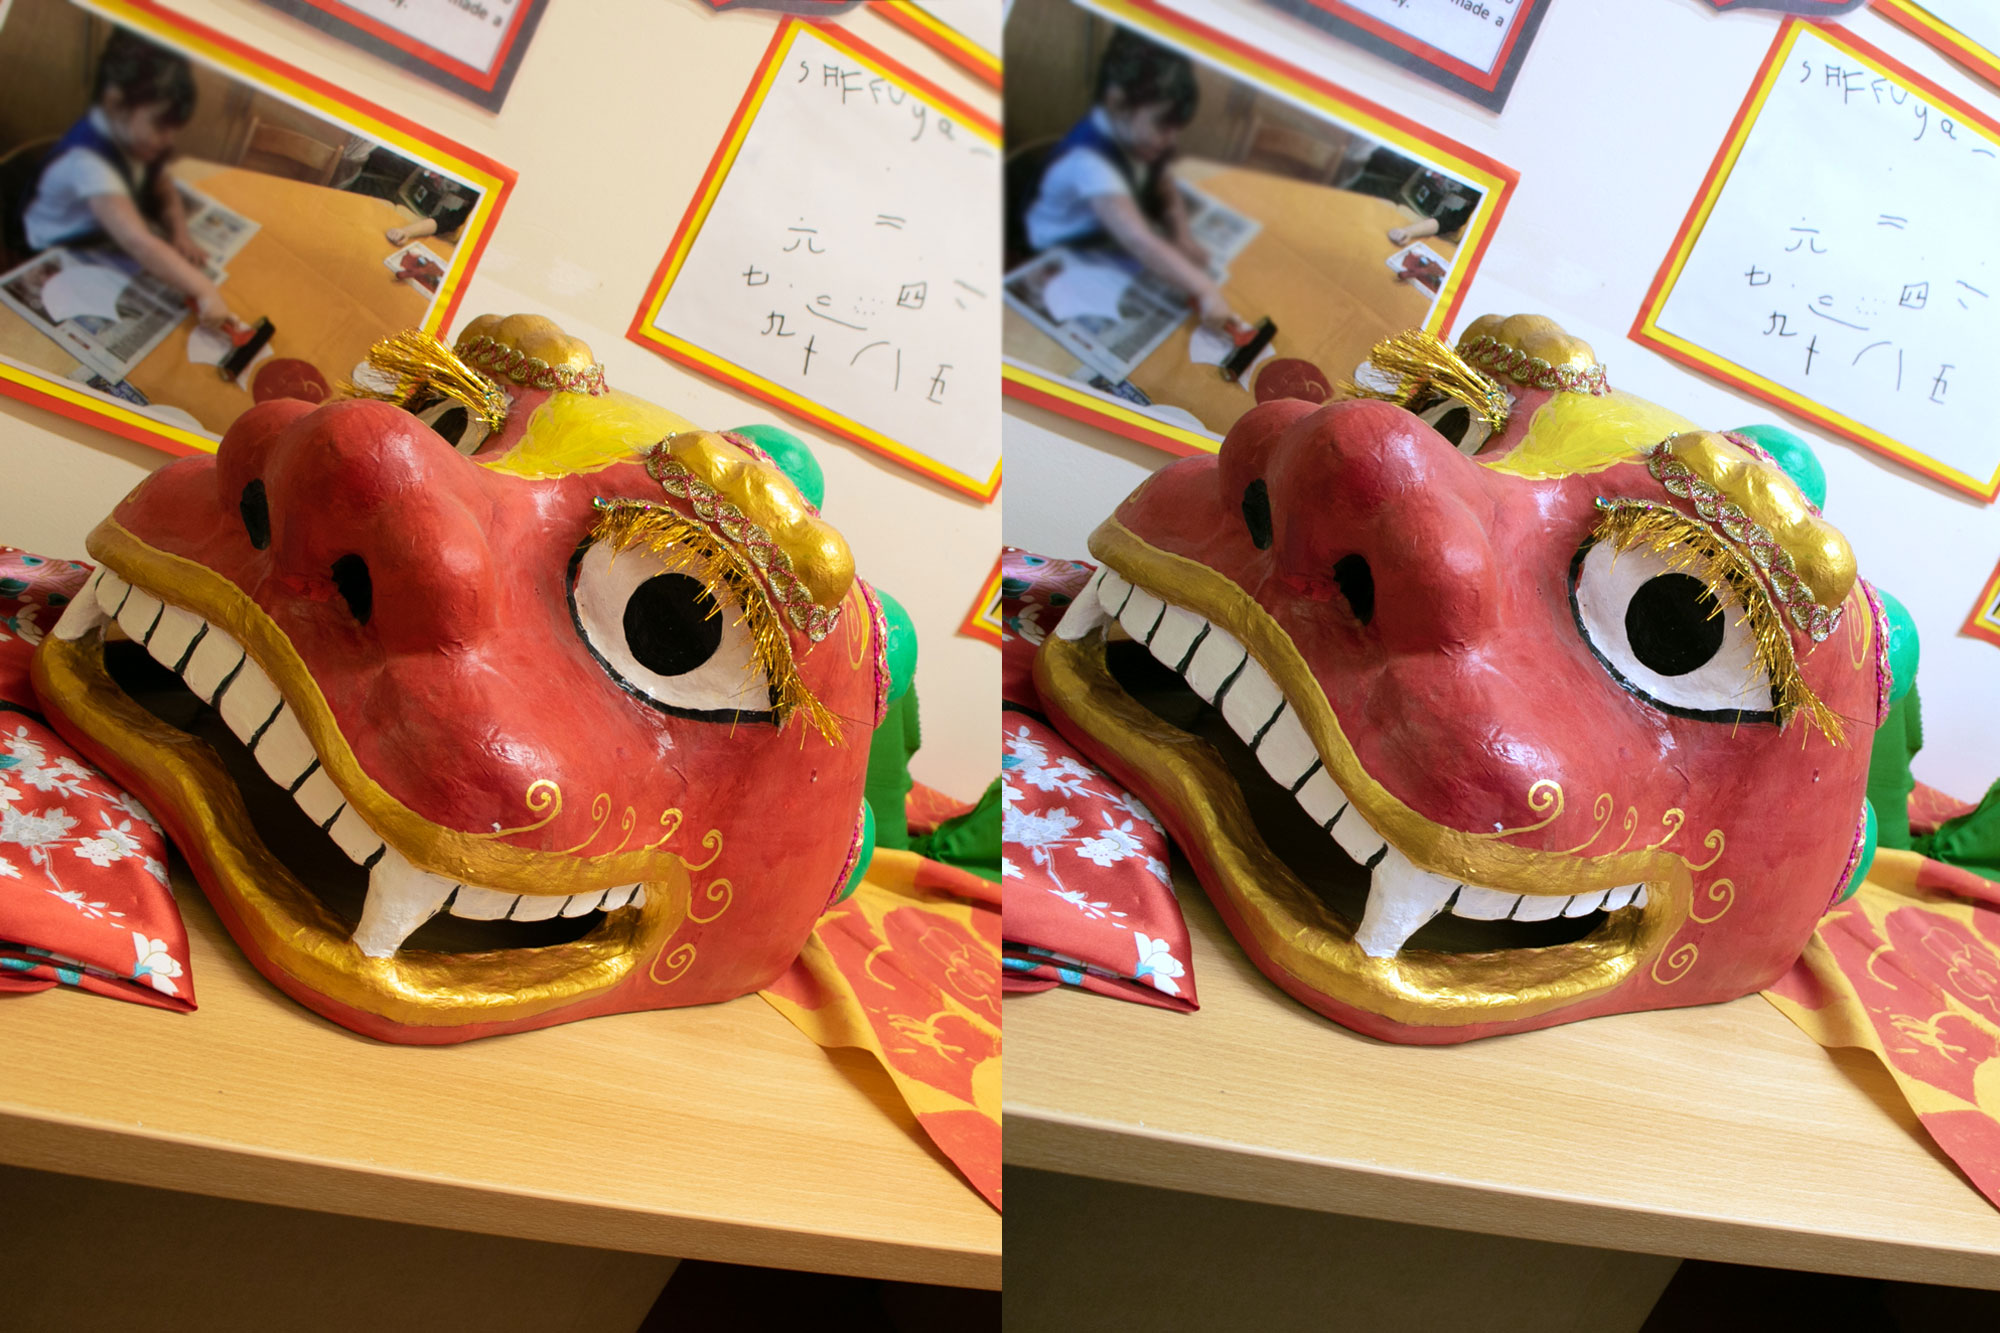
Lastly but not least…Editing!
Why edit your photo?
As I mentioned earlier you can colour correct a photo if taken the classroom. If it’s yellow in colour, you can make the image more blue to colour correct the photo. If the photo is too green, make the image pinker and you will notice it balances the colour out to make it a more normal colour. At this stage, you can have fun and get creative with your photo, by adding text of using different filters.
There are free apps you can use. Canva is great for adding text and style to the photo. Or you can use SnapSeed for editing the colour correction, cropping and much more! Our websites have a Canva button exclusively on the splash images, which is a nice feature to allow to edit your photos with ease.
Here is an example of editing below. The left is the original with a yellowish tinge to the photo. Using the editing software and by making the photo bluer it balanced the colours out.
Hopefully, these tips will help you with your next photo session around the school. And that’s it, now not only are you a teacher but you can add pro-photographer to the CV as well!


Related Posts

Ian Richardson
February 6, 2026
Most schools already produce some form of newsletter. What is changing is how those school ..

Ian Richardson
December 1, 2025
LinkedIn has become one of the most useful places for Trusts to share what they ..

Ian Richardson
September 19, 2025
We’re really excited to share something new that will make it easier for your school ..

Ian Richardson
July 28, 2025
Every now and then, a conversation with a school sums up exactly what so many ..

Ian Richardson
July 15, 2024
Summer is almost upon us, and with the end of the school year in sight, ..

Ian Richardson
January 30, 2024
Struggling to market your school without breaking the bank? Look no further. This no-nonsense article ..


